
If your business has recently added a service, removed a service, or simply need to move some pages around on your site, reorganizing the structure of your website can be an intimidating task if you aren’t a web developer. Should you make a mistake, it can be both expensive and a headache to fix. However, if you use a fantastic content management system like WordPress, restructuring can be simple.
Creating a powerful site structure – or navigation – is critical to the success of your website. Without it, your visitors won’t stick around to learn more and more than likely never come back again.
When you recreate or reorganize your site’s structure, keep the following in mind.
1. Create new page(s)
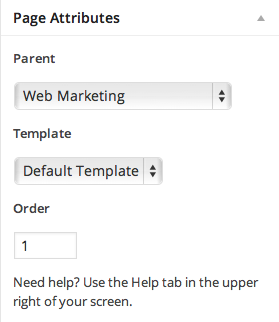
If you don’t already have the page(s) you’ll be adding to your navigation, you’ll need to create them. If your template changes according to page type, don’t forget to set that as well as where the page will live in the Page Attribute section.
2. Alter your Menus
WordPress used to automatically add your new pages, but no longer does. You’ll need to manually add them in the Appearance > Menus section. Simply drag and drop your existing pages wherever you’d like them to go. If you use a Footer menu, don’t forget to add your new pages there, too!

3. Redirects
Last, but certainly not least, if you’ve removed or renamed any of your old pages, you’ll want to 301 redirect them to the new pages. In order to do this, the best (and easiest) way is to use a simple plugin. You can find one by searching your Plugins section.


